
Easy Loose Watercolour Poppy Field
Easy Loose Watercolour Poppy Field

Summer’s here, and what better way to celebrate than painting a vibrant loose watercolor poppy field? These bright, joyful flowers are a favorite subject for their bold colours and simple shapes — perfect for a relaxed, expressive painting style.
Here’s my step-by-step guide to creating your own loose poppy field, even if you’re just starting out! You can also take this as a full length real time video class available for subscribers who are already taking my other full length loose watercolour classes.
What you’ll need:
Always remember, If you don’t have the equipment and paints I have, you can be really creative and use what you do have.
- I worked from a photo – if you’d like to use the same reference photo you can download the PDF photo to refer to within the class video area.
- Paper: 300gsm Arches (140lb) cold pressed watercolour paper or a sketchbook.
- My sheet size is: 27x38cm (11×15 inch)
- Brushes: Jennifer Rose size 10/0 and 0 mop brush. Link here: https://www.rosemaryandco.com/
jennifer-rose-mop. - Kitchen towel (to dab off any excess water) and to create shapes
- Water in a pot
- A scrap of paper to practice your colours with by your side.
-
Windsor & Newton and Daniel Smith Paints:
-
- Winsor Lemon – W&N
- Phyrol Red –
- Permanent Rose- W&N
- Phthalo Turquoise – W&N
- Olive Green -W&N
- Sap Green- W&N
- Burnt Umber
- Chinese White
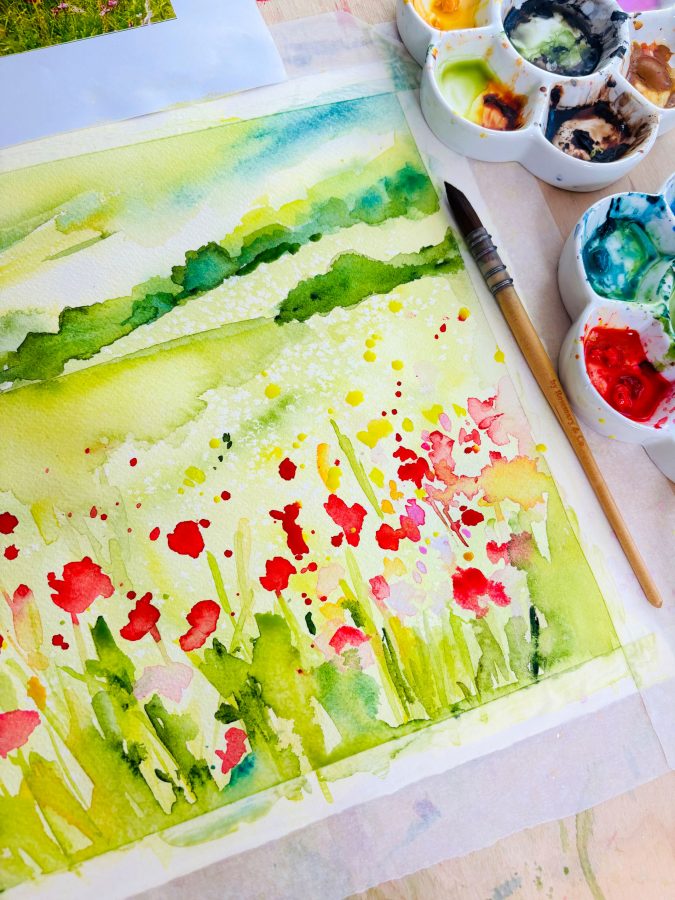
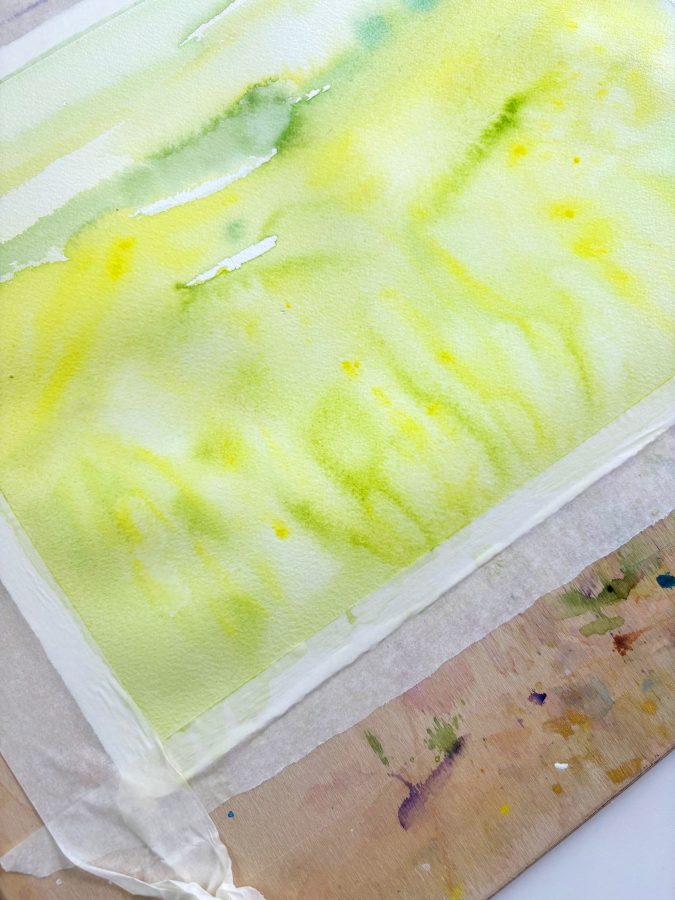
1. Lay Down a Loose Wash – Start with a light wash of yellow and green for the background fields, using broad, flowing brush strokes. Let the colors blend naturally — don’t worry about perfect edges and embrace those watermarks!


2. Sprinkle some salt!
As your background wash gently begins to dry, sprinkle some salt to achieve a summery feel of pollen floating in the air. The effect is gorgeous! Allow to fully dry once sprinkled.
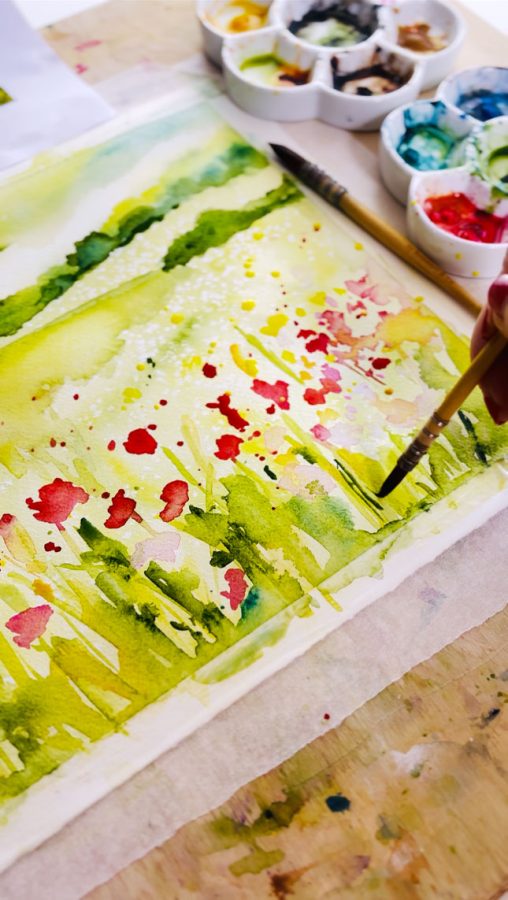
3. Paint the Poppies
Using a wet-on-wet technique, drop in vibrant reds and oranges to form the petals. Let the colors bleed and blend softly for that loose, dreamy effect. Leave some white spaces for highlights.
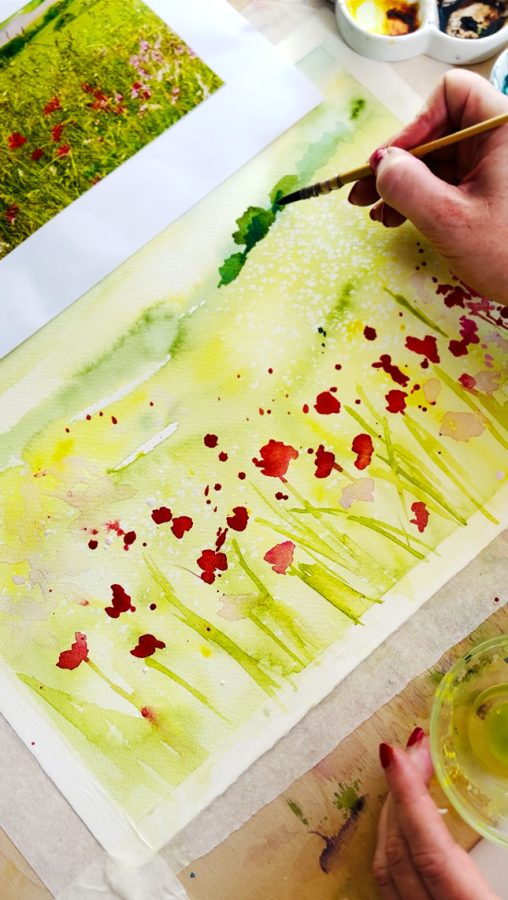
4. Add some trees
Create some depth to your painting by adding a line of trees to the background. Using a combination of green shades, build depth and contour to your background hills. Drop in some turquoise for added vibrancy and sky suggestion.
5. Add Details Sparingly
With a smaller brush, add a few dark centers for the poppies. Keep it simple—remember, the beauty is in the suggestion, not precision.


6. Final Touches
Let your painting dry and then step back to see if any areas need a little more color or contrast. Sometimes less is more in loose watercolour!
Want to follow this painting process in real time?
This full Loose Watercolour Poppies field video class is available in my watercolour class library — perfect for beginners and anyone wanting to paint with more freedom and flow.
Ready to join or want more tips?
You can find this class and others here: https://jenniferrose.art/paint-watercolours-with-me/
Happy Summer Painting!
Love Jennifer Rose xx

Leave Your Thoughts
Sign up to be able to leave your comments and thoughts.
Login
Register
The information that you provide here will only be used to deliver relevant updates from me. You can unsubscribe at any time. Click HERE for my privacy policy.