
How I painted a portrait of Queen Elizabeth ll
How I painted a portrait of Queen Elizabeth ll
A watercolour tribute.
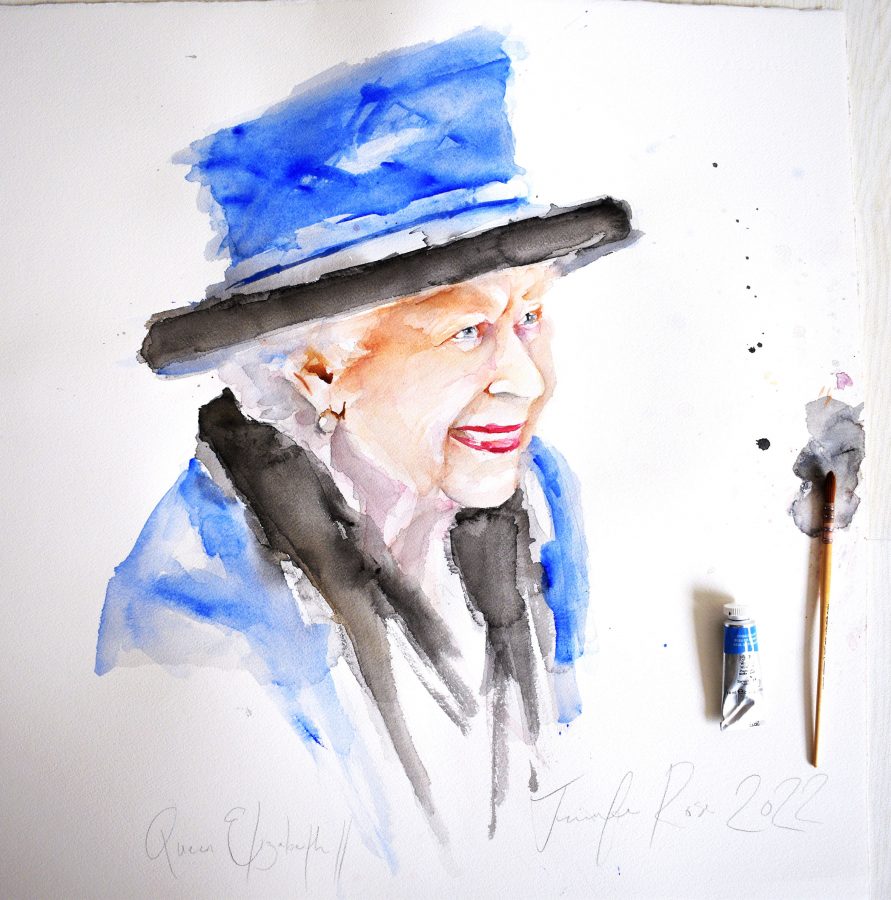
With the news that our beloved Queen Elizabeth had passed earlier this month, I felt I had to pay my respects by creating this loose watercolour tribute.
Equipment I used:
If you don’t have the equipment and paints I used, get creative and try with what you have handy.
- Mop paintbrush – Rosemary & Co Size 10/0
- Daisy palette (for mixing watery paints)
- Water bowl
- Paper towel
- Watercolour paper (preferably cold pressed)
- Paints (see colour list below). I use Winsor and Newton paints.
Paint colours needed:
- French Ultra marine
- Burnt Umber
- Burnt Sienna
- Lamp Black
- Yellow Ochre
- Chinese White
- Quinacridone Violet
- Permanent rose (Lipstick)
Applying the Base Colours
Step 1: I made quick outline sketch of the queen. I took care to outline the eyes, nose and chin very lightly. The hat and coat areas would be created more with my larger loose brush strokes.
*Tip* Take care when outlining to preserve the white areas.


Step 2: Using a watery mix of my yellow ochre, with white paint and a hint of permanent rose (pink colour) I created the skin colour I wanted as a base layer. Using a combination of the french ultra marine (blue colour) and lamp black, I applied the first watery washes to create the hat and fluffy collar to the jacket. I dropped in extra water with my brush to create water marks which added to the textured fluffy collar even more. This process was fast and fun in its application not taking too much time to be accurate.
Step 3: Whilst these bolder layers were drying I used the tip of my brush and my blue colour to create the first layers to the eyes. Observing the light always and keeping the mix watery. I introduced some of my black paint at the same time to create the pupils.
Step 4: Whilst these sections of layers are drying, I use my pure colour of permanent rose to create a watery outline to the lips taking care to preserve the glossy highlights.
Step 5: I introduced a very light watery enhancement of quinacridone purple to create the shading enhancement around the eyes and neck. This really lifts the eye areas and deepens the shading. At all times keep things light if you’re not sure as building up the layers slowly enables you to see things more clearly. I took a break at this point and returned the next day to place down the secondary layers. Of course you can return when your painting is fully dry, but I wanted to take a proper break so I can really see the changes I’d like to make next. This first wash of layers took me approximately 2 hours.


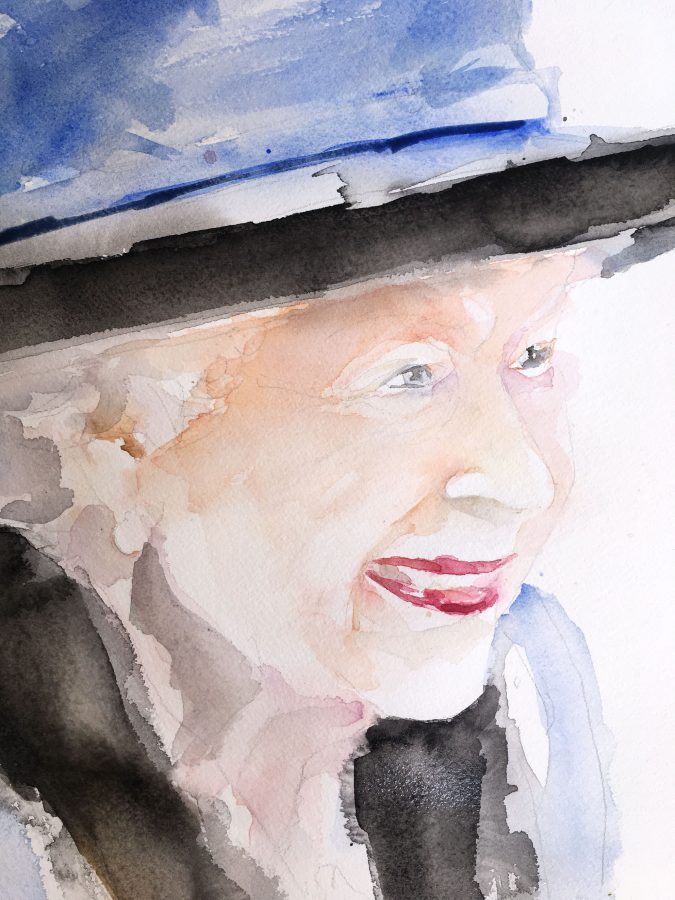
Stage 5: Returning the next day, I was able to see where I’d like to continue building up the layers some more. Using the same mixes as before, I darkened the skin tones and observed the shadow areas further. I took care to preserve the highlights, and dropped in my purple hue into her cheek bones and eyes – Lovely!
Stage 6: Using my burnt umber paint, I created the form to the ear and outlined the pearl earrings. I love creating the impressionistic style loosely of these areas.
Stage 7: With each layer drying, I continued to layer up and observe the shadows. In the very last stages and being brave, I included a very light grey wash over my skin tones and neck to further enhance the shading. This must be applied when the layers underneath are completely dry. This is because if I felt I went too dark in areas, I could gently lifted off any excess paint with my kitchen towel without disturbing the previous layers.
Stage 8: I included any finishing touches to the eyes and laughter lines to the face using the tip of my brush.
Here’s my finished painting:

I hope you like her as much as I do! I would LOVE for you to leave me a comment below:
I will definitely be painting more portraits!
Love Jennifer Rose xx
Leave Your Thoughts
Sign up to be able to leave your comments and thoughts.
Login
Register
The information that you provide here will only be used to deliver relevant updates from me. You can unsubscribe at any time. Click HERE for my privacy policy.