
How to paint loose watercolour Barn Owl in 8 easy steps- A half hour study
How to paint loose watercolour Barn Owl in 8 easy steps – A half-hour study.
In this step-by-step guide, I will show you how to paint a loose watercolour barn owl with lots of textures and patterns in its feathers. I worked from a photo and if you would like to work from the same reference photo as me, please contact me for more info. Alternatively, you can paint along just by using my painting as your guide.
I love painting barn owls and I have painted them many times over the years. You can read all about how Barn owls inspire me in my latest journal entry.
This tutorial is a half-hour study and we are going to use washes and colour layering to create a loose watercolour look.

What you’ll need:
If you don’t have the equipment and paints I recommend, get creative and try with what you have handy.
- A photo of a barn owl or as your reference.
- HB Pencil
- Mop paintbrushes – Rosemary & Co Size 10/0 and 0
- Daisy palette (for mixing watery paints)
- Water bowl
- Paper towel
- Watercolour paper (I recommend Arches cold pressed paper)
- Paints (see colour list below). I use Winsor and Newton paints.
Paint colours needed:
- A yellow colour (I used Windsor lemon)
- A dark yellow colour (I used Yellow Ochre)
- An orange-brown colour (I used Burnt Umber)
- A reddish-brown colour (I used Burnt Sienna)
- A blue colour (I used Cobalt Blue)
- A grey colour (I used Payne’s Grey)
Place your reference piece as near as you can to your paper. This will help you to get as close up as possible to observe the tonal variations of colour and the texture of the feathers as you paint. I have created an outline sketch of my barn owl so that I can keep track of where to place my paints for this short study.
*TOP TIP* – Keep your mixes watery and light, this helps you work fluid and fast and not commit to your shapes, make sure you keep your kitchen towel handy!
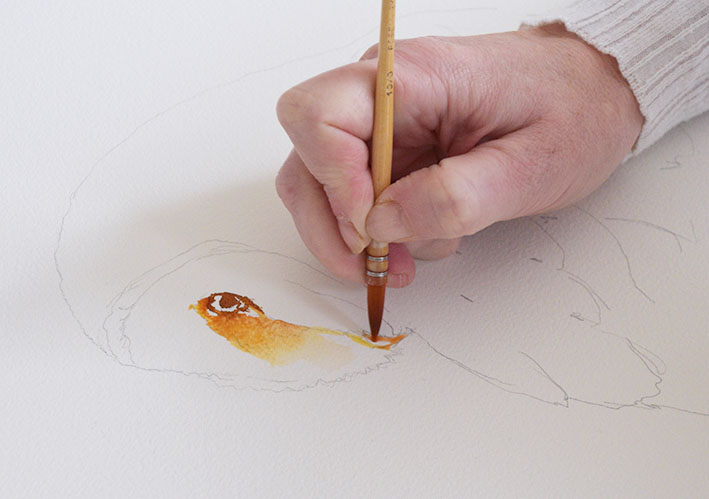
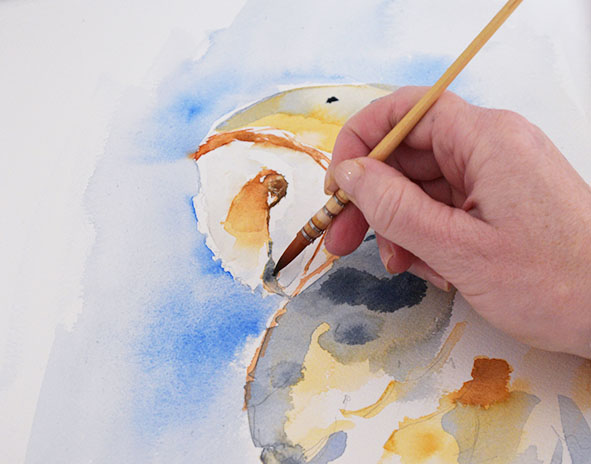
Step 1: We are going to start with the eye, as this is the main focus of the picture. Start with a mix of your orange-brown colour (I have used burnt umber). Using your smallest brush, use the very tip outline and define the shape of the owl’s eye. When you are happy with the main shape, use the watery mix, start filling in around the eye, by moving the paint away from the eye on the paper. Using the wet on wet technique drop in some of your light yellow colour (I used Windsor lemon) onto your brown colour to make lighter brown hues within the eye. Then going back to your watery mix, soften the edges of the eye so it blends to start to create the texture of the feathers around the eye. Whilst we are working with our brown colour and using the tip of the brush we are also going to outline the shape of the beak. Leave these layers of paint to settle.

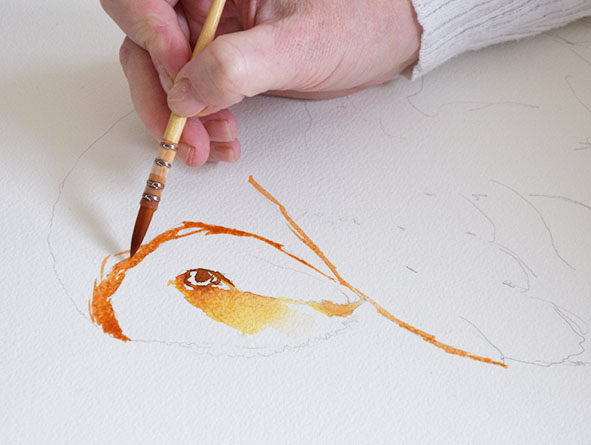
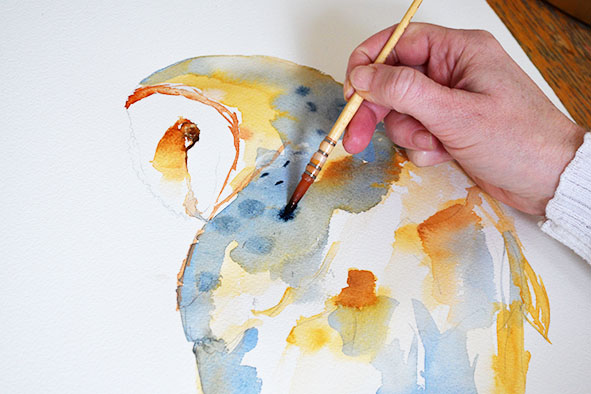
Step 2: Next we are going to outline the shape of the owl’s face and wing, using a watery mix of your reddish-brown colour (I used burnt sienna). Next switch to your bigger brush. Using the side of your brush use big bold strokes to start filling in the body of the owl. You may need to add some water to the painting to help your brush drag the pigment down the page. Whilst this stage is still wet, drop in some pure dark yellow and pure reddish-brown to start creating depth and texture. Continue to outline the wing shapes and body of the owl. Keep adding in pigment where you want to define some of the feathery areas, keep checking your reference photo to make sure you are following the patterns within the owl’s shape.
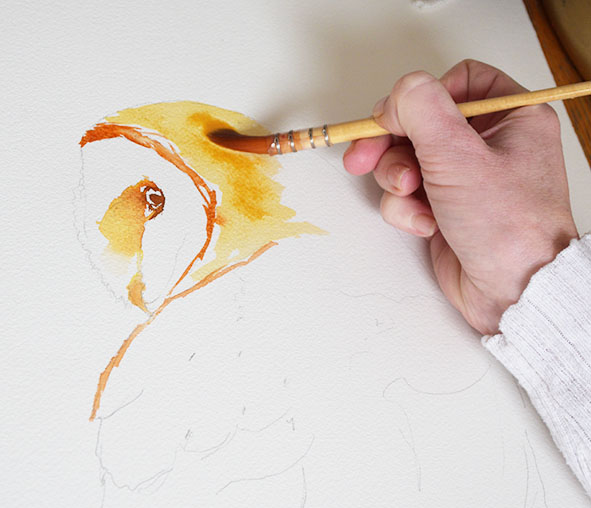

Step 3: We are now going to make up a watery mix of our grey colour. It needs to be a really light watery wash. We are going to start dropping this into the owl to create more of the feathers. You should see the wet in wet effect taking place, and where part of the paper is still white and some of the layers are already dry you will see the vibrant hues coming to life! And where it is still wet, watermarks will appear. Continue to drop in colour where you need it and outline the feathery details by dragging the paint with the side of your brush. I am also varying the hue and keeping it lighter in some areas. Now let this all settle back.
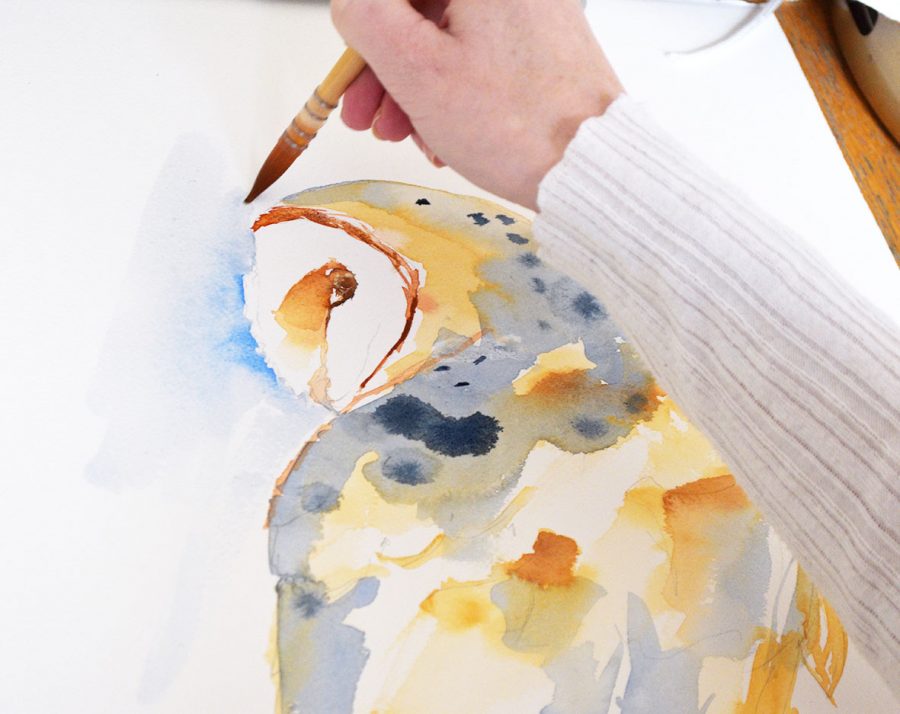
Step 4: It’s time to revisit the eye area. Using your small brush and your grey colour, we are going to create more depth to the painting. I have noticed some lovely patterns forming in paint, so I want to keep those, so will paint around those areas. Very lightly soften the inner eye section with the very tip of the brush. There is a light part to the eye, but it is a very subtle shade, so I am going to paint this in, and not leave it as white paper this time. With your orange-brown colour, just outline the eye a bit more, taking care to create the right shapes, again looking closely at the reference photo. Take the colour and merge it outwardly to create depth. Now let this dry completely.
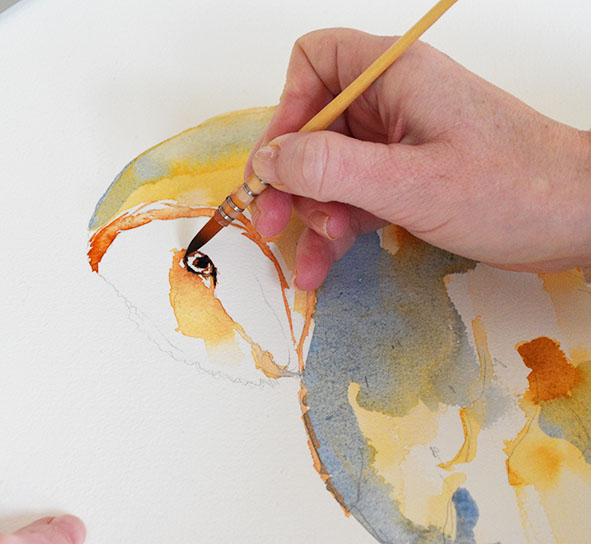
Top Tip* – It can be easy to add too much to the delicate eye areas, if you go wrong just dab off with a piece of kitchen towel. Sometimes the kitchen towel creates some exciting shapes all of its own!
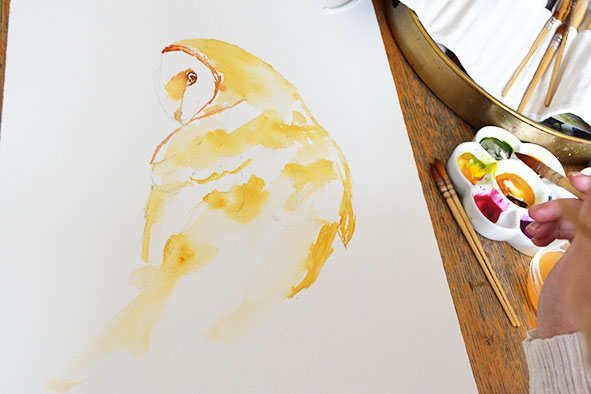
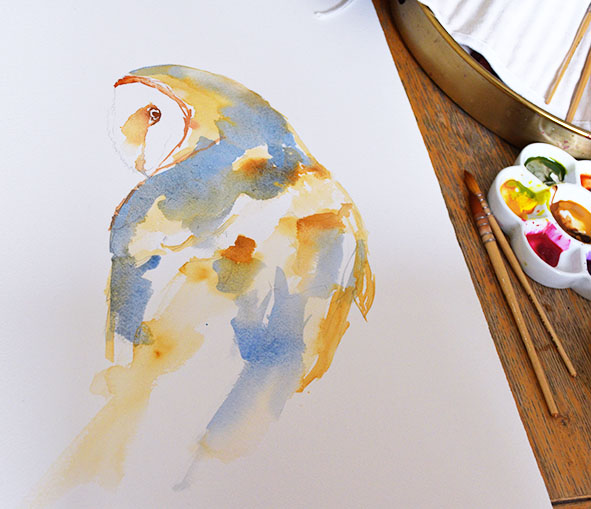
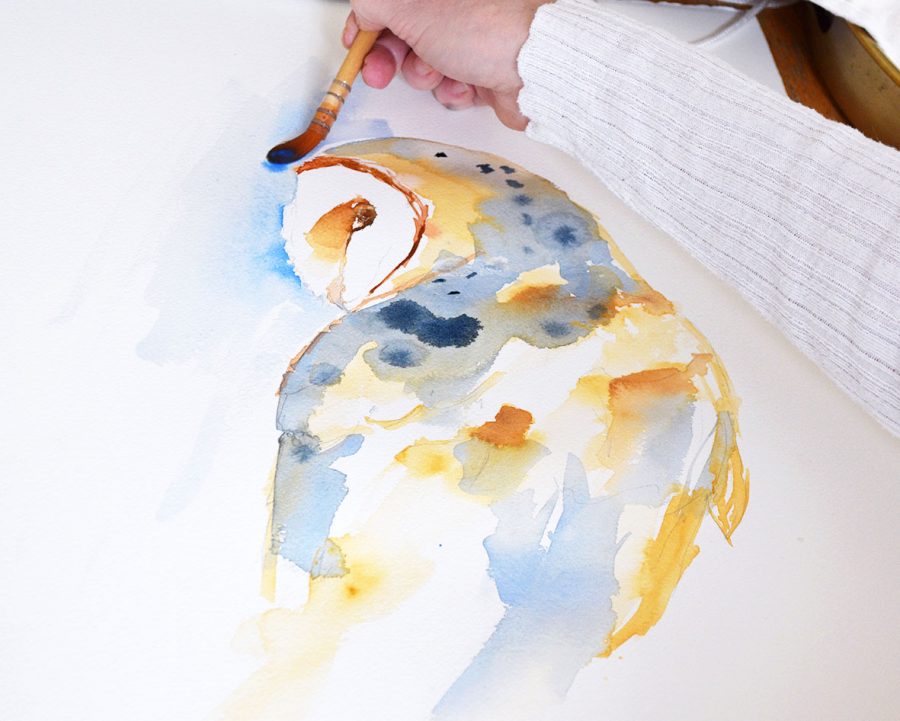
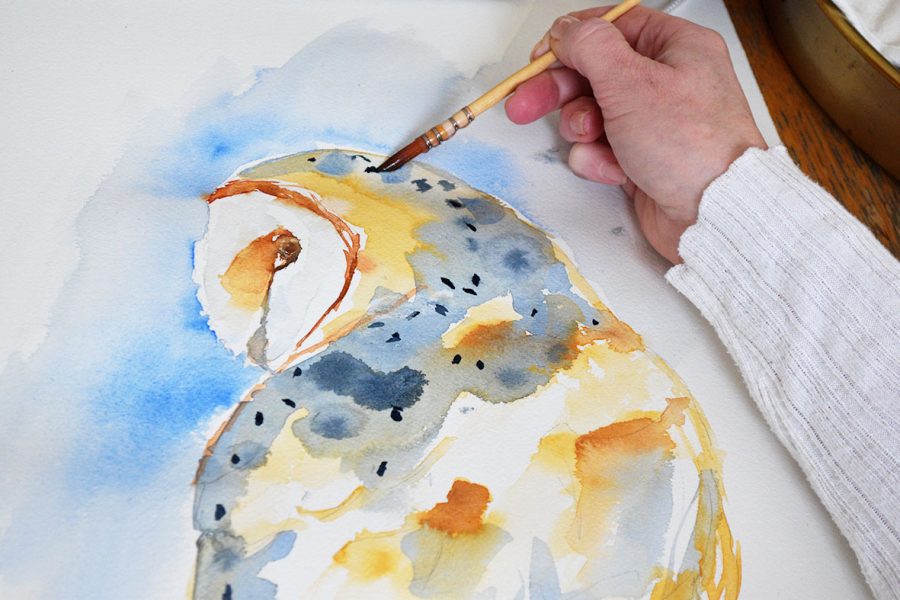
Step 5: It’s now time to return to the body of the owl. I have noticed a spotty pattern in the owl’s feathers, so I am going to drop in my grey colour and let it disperse on its own. Let the colour run, we want to embrace its natural pattern to help create our texture.
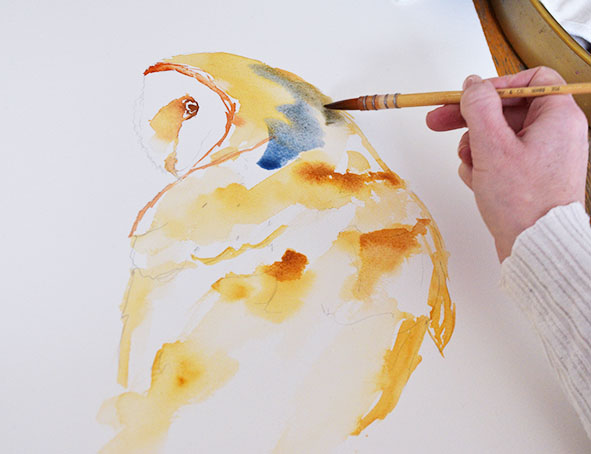
Step 6: We are now going to go back to working on the owl’s face. We are going to be bold! Using a watery mix of your blue colour use your smallest brush to outline the owl’s face and capture its white feathery texture. Next using the side of your brush drape out the colour from the face to create a vibrant blue background. Extend the blue background around above the head to really make it pop off the page! I decided to drop in some extra blue to make some areas of the background darker, but don’t overwork it!
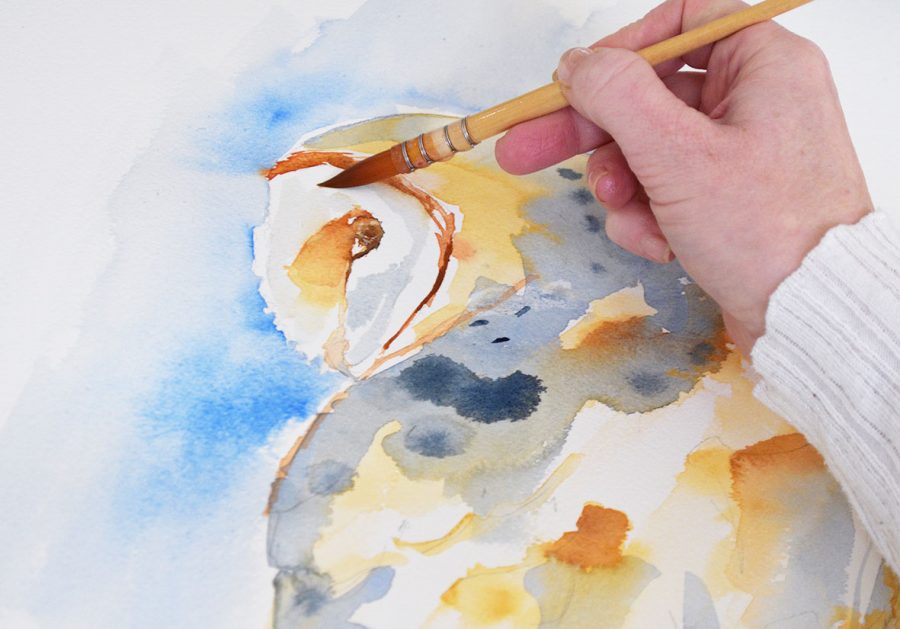
Step 7: Still working on the face, with your grey colour, using your large brush and a very light watery mix, we are going to create shading to the face. It may touch the edges of the other colours, but this just adds to the overall loose effect. Create the shadows where needed by adding the grey to the face and dragging it out. Once you are happy with the overall effect, let it dry.

Step 8: Finishing touches.
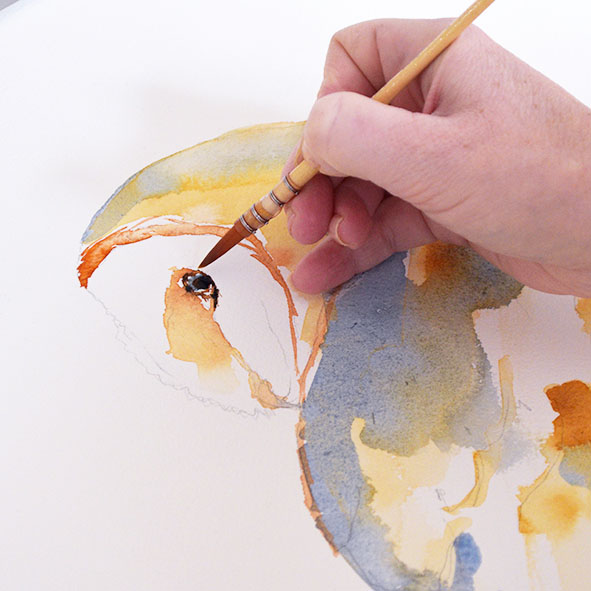
Now it’s time to go back and give more depth to the eye and more detail to the beak. Using your large brush, mix a burnt umber and grey wash to make a brown blue dark shade to enhance the eye and beak shape. Make sure you let some of the other colours painted in the first stages come through by keeping your mixes light and watery.

You can also use your grey wash to drop more pigment onto the body to create more shapes, and if you feel you need to, use water to soften some of the edges of your owl. This will create a soft atmosphere to surround your owl.
I have also added some more blue to the top of the head for a final enhancement. Remember if you think you have gone too far, you can always lift off the paint with your kitchen towel. Now let your painting completely dry.
I hope this step-by-step guide has helped you paint your very own barn owl and given you the confidence to try and recreate other feathery watercolours!
I’d love to know and see your results! Tag me on Instagram and use the hashtag #jenniferrosegallery so I can see how you got on. You can also find me on Facebook
Make sure you hear about my latest step-by-step guides, video mini-classes and inspiration journal entries – all for free – by signing up for my newsletter.
I can’t wait to hear from you!
Love Jennifer Rose xx
Leave Your Thoughts
Sign up to be able to leave your comments and thoughts.
Login
Register
The information that you provide here will only be used to deliver relevant updates from me. You can unsubscribe at any time. Click HERE for my privacy policy.